
Warning! Reading this blog post could cost you money. I just got the new Canon SX 50 HS point and shoot super-zoom camera and I love it. It's in my right hand, my Canon 1D Mark IV with the 300mm lens and 1.4 teleconverter is in my left hand. The SX 50 HS has a 12.1 megapixel back-illuminated CMOS sensor, DIGIC 5 image processor, image stabilization, ISO 80-6400. The focal length when optical and digital zoom are combined is as follows (35 mm equivalent) 24-4800 mm (24-1200mm with optical zoom alone.) It can shoot RAW. Here are some of the reasons why I love the SX 50 HS.

It shoots birds in flight fairly easily in Sports Mode, as I found out yesterday when I tried it out on Brown Pelicans and got this photo.

Or how about this photo of a White Pelican I took recently.

Recently I took the Canon SX 50 for a test spin to Harn's Marsh in FL. See the ducks in the pond near the far shore?

Here are the ducks zoomed in a little closer, they look like black spots.

Now here are the Ring-necked Ducks photographed with the lens zoomed all the way in, past the optical zoom range, into digital zoom of 200x. Camera was set on Smart Auto photo is untouched.

There were a number of other birds that were just too far away for my other DSLR cameras, such as this Limpkin in the far cattails.

The Limpkin was preening then stretched.

This Black-crowned Night-Heron was way out of the reach of my usual cameras. There is something immensely fun and powerful in being able to zoom in on very distant birds and get a photo.

The camera has great abililty just set on Smart Auto and people should have little problem photographing close, or relative close, birds in decent light. The harder part is hand holding the camera still when you are zoomed all the way, or a good part of the way, in on a bird. Many people may not want to or be able to do this, but that is where the fun is for me. Here is my tip for steadying the camera while hand holding and shooting with the lens zoomed in closer on the bird. To steady the camera look through the viewfinder with the camera braced against your head. Do not shoot while looking through the back screen. Hold the barrel of the lens with your hand all the way out on the barrel and tuck your elbows against your body, making a tripod of your body. Try to hold as still as possible. Depress the shutter half way to focus on the bird, then take the photo quickly. If you then lose the bird in the viewfinder, zoom back out to give you just a wide enough field of view to find the bird again, zoom in, then get the bird in focus and take another photo. You can also use the uppermost button on the left had side of the camera near the base of the lens for Framing Assist-Seek. Hold this button down and the camera zooms out, allowing you find and reacquire the subject. Take multiple photos, some shots will be sharper than others.

Another place we went recently was the Bailey Tract on Sanibel. See the Wilson's Snipe on the far shore?

Here it is with the camera zoomed in to 200x.

The Mottled Duck was closer than the snipe, see the dot in front of the island? I am standing on the bank taking the photo with the camera on 24mm.

Here is the Mottled Duck taken with camera on Smart Auto and the photo only slightly sharpened in photoshop.

There were Gulf Fritillary butterflies at my feet and it was so cool to be be able to take their photo as well as the distant birds.

The view from my back deck in my FL home. See the eagle?

Oh, here it is with the camera zoomed in...

Here it is zoomed even closer.
Note, with many of these photos I have pushed the camera to its limit at 200x and at this range, photo quality drops. I have steady hands so for me, it's fun to zoom all the way.
To get good photos, use the camera in good light and keep it in the optical zoom range of 24-1200 mm. This camera does best in good light and photo quality diminishes in low light. If you are not steady, you could use the camera on a tripod. To zoom closer to the bird, use the Digital Zoom which lets you apply up to 1.5 or 2x (up to 2400mm) worth of digital zoom beyond the optical zoom with a minimum drop in image quality, sort of like applying a 1.5 or 2x teleconverter. Access this feature on the regular camera menu. Scroll down to where it says Digital Zoom and your choices are to set it at Off, 1.5x, 2.0x or Standard. Standard lets you zoom all the way in 200x, but there will be a loss of image quality at this far range. You can also use the "Framing Lock" button (on the bottom of the lens barrel) which helps stabilize the image when you take it.
To get good photos, use the camera in good light and keep it in the optical zoom range of 24-1200 mm. This camera does best in good light and photo quality diminishes in low light. If you are not steady, you could use the camera on a tripod. To zoom closer to the bird, use the Digital Zoom which lets you apply up to 1.5 or 2x (up to 2400mm) worth of digital zoom beyond the optical zoom with a minimum drop in image quality, sort of like applying a 1.5 or 2x teleconverter. Access this feature on the regular camera menu. Scroll down to where it says Digital Zoom and your choices are to set it at Off, 1.5x, 2.0x or Standard. Standard lets you zoom all the way in 200x, but there will be a loss of image quality at this far range. You can also use the "Framing Lock" button (on the bottom of the lens barrel) which helps stabilize the image when you take it.
At these extreme zoom ranges, such as 200x, the photo quality is not usable for many things such as fine prints. However, for use on blogs, a facebook page, etc., and the internet, which only require photos of 72 dpi, these photos may be usable. Most of these photos I took had minimal processing just a little sharpening in photoshop. Images shot closer, at lower ISO and within the optical range would be much better. I mainly wanted to show some of the extreme things this camera is capable of.

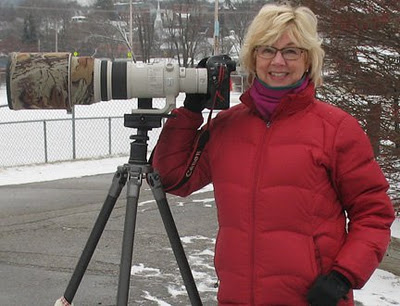
Don't get me wrong. The Canon SX 50 HS does not produce the same quality images that DSLR cameras do and you should consider purchasing these if that is what you want. I adore my Canon 1D Mark IV (shown here) and I have gotten incredible photos with it, many used on our national field guide, The Stokes Field Guide to the Birds of North America and our soon to be published, The New Stokes Field Guide to Birds: Eastern and Western Region. I use the Mark IVwith a Canon 300mm IS lens and 1.4 teleconverter, or my Canon 500mm IS lens with 1.4 teleconverter, Gitzo 1325 Carbon Fiber Tripod and Whimberley head. The Canon SX 50 is not in the same league with the big, professional, or near professional DSLR equipment. Then again, it costs around $430 vs. the Canon 1D Mark IV originally cost around $5,000 (now it is discontinued, can be bought used for less. Many are buying the new Canon EOS-1Dx at a cost of about $6,799.)

At Harn's Marsh I had my Mark IV with the 300 mm lens with 1.4x and in seconds got this Harrier shot. I could not have gotten this with the SX 50.

There is nothing like the thrill and adreneline rush of capturing something like this eagle landing with my 500mm lens and the high speed shooting ability of the Mark IV. You photographers with similar equipment who are reading this know what I mean.
However, the Canon SX 50 HS is an astounding camera in many ways. It can make decent bird photographs within the reach of even a novice bird photographer just by shooting on Smart Auto, then Sports Mode for birds in flight. In the hands of more experienced photographers it can provide great fun and the ability to capture good bird photos, even when birds are impossibly far away. It will make getting record shots of birds more possible because the reach of the camera is so great. It may convert many to bird photographers/birders and give them a love for and appreciation of birds. That would be a good thing.
It is interesting to me that just about every birder, experienced bird photographer, or novice birder/photographer I have showed this camera to in the last week has said they want one. The light weight of the camera and ability to zoom in so close on a bird just blows people away.
There is so much more to say about this camera which does so many things. I still have a lot to learn about it. Make sure and read the complete reviews here at,
and
Here are a few more thoughts and tips.
- Compared to the Canon SX 40 HS, which I also own, the Canon SX 50 is way better. It has a larger, sharper LCD, faster AF and continuous shooting speeds, and more available scenes in Smart Auto mode. Canon claims it has reduced focus times by 50% and shutter lag by 44%. It shoots 13.0 frames per second in High Speed Burst mode (which has limitations.) The weight is 1.31 lb.
- For more control over photos, many people will want to shoot in Aperture Priority.You choose the aperture and the camera picks the shutter speed. The range is F3.4-F8. I often use this mode and set ISO and exposure compensation as needed.
- Other people may want to shoot in Program Mode, where there is automatic shooting, but with access to all menu options. A Program Shift feature can be activated by halfway-pressing the shutter button and then pressing "up" on the back dial (four-way controller). After that you can use the dial. to scroll through various shutter speed/aperture combinations.
- You must read the manual, which you download to your computer as a PDF. Read it multiple times and learn all the dials and how to set the camera functions.
(P.S. If you have this camera and want my tips on how to use it, email me. Email link is on top right of this blog.)
Practice and most of all, have fun!!!